
Your summer ensemble just isn’t the same without a psychedelic rainbow of colors to tie it all together. A tie-dye shirt, dress, or skirt is just the thing to top off your hot-weather attire. And they’re fun to make, too! Check out our guide to creating your own tie-dye fashion items.
Gather Your Supplies
Tie-dyeing only requires a few simple items. Grab an article of clothing or some fabric you want to dye that’s at least 60% cotton. Choose a light color, so the dye will be visible. (Or, conversely, go with a dark color and use bleach in place of dye.) You will also need squirt bottles, dye, some string or rubber bands to create patterns on your fabric, and a few protective items, which we’ll talk about below.
To make things super easy, you can even buy a preassembled tie-dying kit, like this one.
Protect Your Work Area & Yourself
Tie-dyeing is easy, but it can be pretty messy. Even if you fancy yourself cleaner than most, you’re better off safe than sorry. If you’re going to be doing your dyeing indoors, start by spreading out a sheet of plastic, a drop cloth, or some newspaper – anything that will prevent the dye from soaking through and staining your work surface. You’ll also want to wear clothing that can get stained and rubber cleaning gloves. Many tie-dyeing kits come with all these things, if you choose to go that route.
Get Dyeing
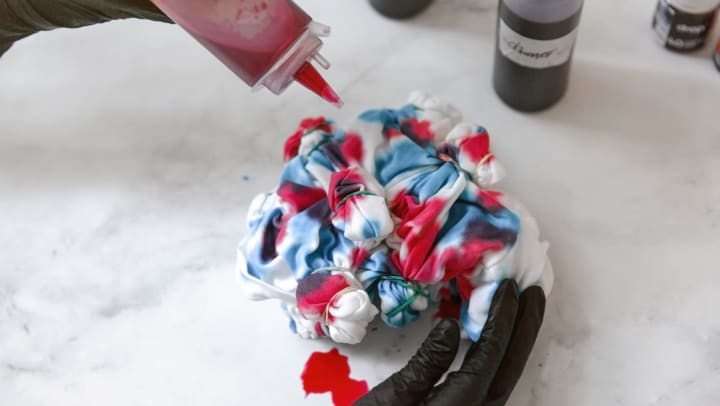
Start by preparing the dye in one or more of your squirt bottles. Then, twist bits of your fabric up and secure them with string or rubber bands, or wad the whole thing up into one big ball, so that some parts will get the dye and others won’t. Use the squirt bottles to saturate your fabric in dye. If you’re planning on doing multiple colors – and why wouldn’t you? – start with the lightest color first.
Add Another Color
This is optional but cool. Untie your shirt and let it dry out from the first round, and then rinse it till the water runs clear (or follow the instructions on your dyeing kit). Tie your fabric or shirt up in new ways, grab another color or two, and repeat the process. Repeat that as many times as you want, until your shirt is super psychedelic. That’s it, you’re done! Now put it on and go show the world.
For more tips on adding a bit more color to your summer, visit the Olympus Fenwick blog.