
If you’re interested in upcycling, jewelry making, or playing with blow torches, try metalsmithing! We’ll walk you through how to use thrifted jewelry to create new custom pieces.
The Search for Silver
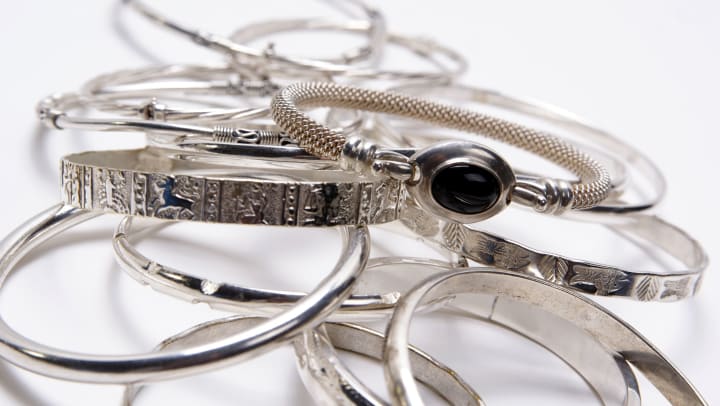
When it comes to metalsmithing, it’s important to understand that different metals and alloys have different melting points and obstacles. Because of this, it’s easier for beginners to stick with items that are all of the same composition. While you’re at the thrift store, look exclusively for sterling silver pieces, to ensure the best results. How do you know it’s sterling silver? Bracelets and rings will often be engraved 925 (meaning 92.5% silver, the requirement to be considered sterling silver). Look for pendants, chains, or bangles that don’t have a complicated design and will be easy to break into pieces.
Not everything labeled silver actually is, however. Learning to correctly identify metals comes with time and practice. If a pendant is especially shiny, untarnished, or feels suspiciously light, that is an indication it is either mislabeled or has a coating that can mess up your smelting.
Prepare to Smelt
Smelting is what you call it when you melt metal down to pour into a new jewelry form. After you’ve picked out a variety of things to transform into new pieces, you’ll want to use wire cutters (most jewelry kits will come with a few pairs) to cut the jewelry into small pieces, so nothing sticks out of the crucible (the container you melt your metal in). Add a bit of flux powder to help separate any metal impurities and prevent the liquid metal from sticking to the crucible.
Smelt & Cast
Holding the crucible in your nondominant hand so you have maximum control of the blowtorch, get torching! Use big, loose circles with your crucible hand while using tight precise circles with the blowtorch hand. The silver will turn red and bubble. When everything is smooth and entirely melted, you’re ready to pour your cast. You can create or purchase jewelry casts, but for beginners you can pour your melted metal over a bucket of water or peas as you get used to the smelting process (it will cool immediately, creating neat abstract shapes).
Solder & Polish
Now that you’ve cast your new pieces, you’ll want to use a Dremel to smooth down the sharp edges and then solder on a ring so you can wear it or attach it to a chain. When your piece is complete, you’ll boil your prized project in a pickle pot and polish it. Voila, you’re ready to start your new jewelry side business.
There are a lot of safety precautions to take into consideration when smelting and metalsmithing, so be sure to check those out before you start! Other than that, just practice.
Ready to learn more cool things? Check out the Mountain Trail blog.